DIY parallettes are another important piece of gym equipment to build yourself if you want to build your own gym in a spare room or garage. While fitness is becoming increasingly important in everyone’s lifestyle, it’s great to have access to a fully functioning gym 24 hours a day so you can work it around your busy schedule. It also saves a ton of money on gym memberships and a lot of time driving back and forth to the gym.
But building a professional gym can cost a lot of money, and, understandably, when you first start, you’ll want to kit out your gym on a budget. Instead of accepting that you’ll have a massive one-off payment to get in all your shiny new equipment, why not make your own? It’s cheaper and, in most cases, will work just as well, but first let’s start with DIY parallettes.
Read More:
- Best 3 Peloton Elliptical Reviews
- Best 3 Incline Treadmill Reviews
- Sole F85 Treadmill Reviews
- Top 3 Matrix Treadmill Reviews
- Best Elliptical Machines Under $500: Top 5 Options Reviewed
WHAT ARE PARALLETTES?
Parallettes are parallel bars attached to the floor that you can use for exercises specifically designed to strengthen your upper body. The parallettes aim to use your body weight to help strengthen your functional muscles. Depending on the types of exercise you choose, you can work on your biceps, triceps, wrist strength, and core and back muscles.
They’re a favorite piece of gym equipment for gymnasts or people who play hand-contact sports such as squash or tennis. The great thing about parallettes is that they’re easy to DIY at home and are cheap too.
HOW TO MAKE DIY PARALLETTES
Because parallettes are such a simple piece of equipment, a few different materials will work when you’re making them.
PVC
PVC is light and versatile, and all the shapes you require can be purchased ready-made, so it’s one of the easiest DIY methods. You just need to fit the pieces together.
Materials:
- 4 T-joints
- 4 Elbow Joints
- 8 Caps
- Strong Glue/Cement
- 12 ft PVC Piping
- Hand Saw
- Mallet
- To make the handles, measure out 2 strips of 8-inch straight PVS piping.
- Then measure out 4 strips of 6-inch straight piping. These will make your supports at either end.
- Cut all your pieces out, trying to be as accurate as possible, using your hand saw. You’ll need to do this against a saw bench or hard surface. If the ends don’t come out as perfect as you’d like, it might be a good idea just to sand them off before use to prevent any sharp edges.
- Prepare your cement or glue. (Ensure your glue is specifically designed to bond PVC together and will hold your weight once dry). You’ll need to add your adhesive to the end of each portion before slotting them together.
- Attach your elbow joints to one end of your 6-inch pipe, then slot in the 8-inch to the other end, making an extended ‘r’ shape.
- Add the other elbow joint and 6-inch pipe at the other end, making it an ‘n.’
- Do the same for the other sections that you’ve cut out.
- You’ll then need to cut your bracing portions (to weigh the parallettes down, so you don’t fall over). Cut out 8 strips of 6-inch piping.
- Add a T-joint upside down to the end of your ‘n’ support pipes. It would help if you used a mallet to gently push the T-joint in place to ensure that you get each side level. (Don’t hit too hard though, you may split the PVC).
- Then add the bracing sections to each side of the T-joint so that your parallettes stand up on their own. Again, use the mallet to ensure they’re in place correctly.
- Place the caps on each end of the bracing portions, as this will stop your parallettes from getting damaged on the floor.
Using these measurements will allow you to create long-lasting parallettes around 7-inches from the floor; perfect for your calisthenic workout.
Read More:
- DIY Battle Ropes – How to Make Your Own Battle Ropes
- DIY Kettlebells for Under $8 in 6 Easy Steps
- How to Clean a Treadmill Belt
- How to Fix a Treadmill Belt That is Folded: In 7 Easy Steps
- Why are Dumbbells Expensive? Here’s The Deal
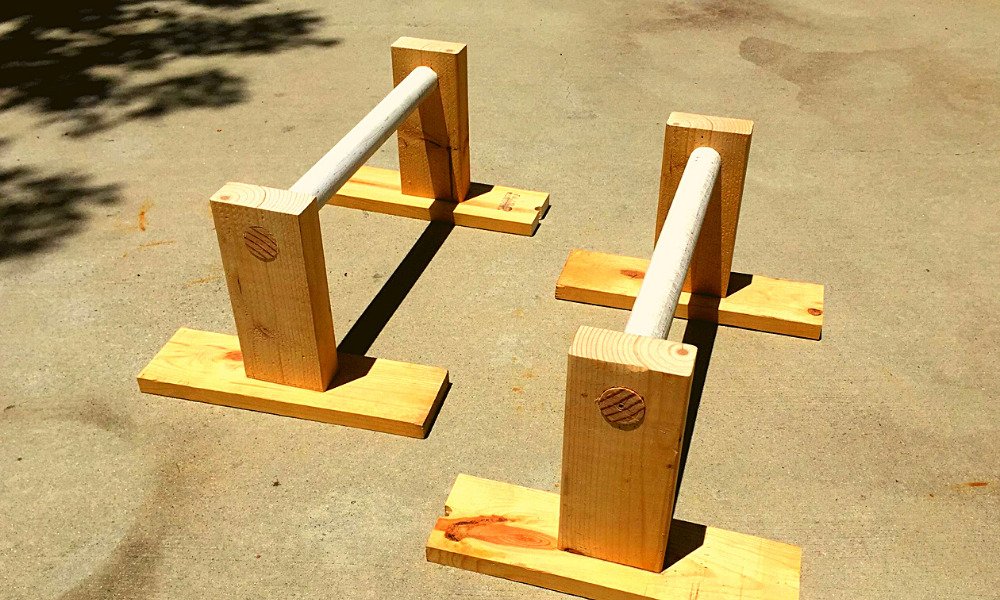
WOOD
If you’re looking for something a little more durable and visually pleasing, you might want to go for the wooden option.
Materials:
- Drill Press
- Epoxy
- 4 Brass Screws
- 4 Feet of 1.5 Wooden Dowel
- 4 Feet of 2 x 6 Wooden Plank
- 4 Feet of 1 5/8-inch Copper Pipe
- 1 5/8-inch Copper T-joints
- 1 5/8-inch Copper Couplings
- Cut your wooden plank to the required size. As you have 4 feet measured out, the obvious choice is to cut this in half to provide a pair of 2-foot-long parallettes.
- Cut your wooden dowel, so you have 2 pieces that are 40-inches shorter than your wooden plank.
- Mark out guide holes in your plank at either side – 2-inches from the ends. These will be to drill your holes for the supports.
- Drill your holes to the exact width of your copper piping.
- Cut your copper pipe into 3-inch strips (you’ll need 4 of these for the supports).
- Insert your copper piping into your drilled holes and secure with epoxy.
- Drill a hole in the center of each of your T-joints across the top bar of the ‘T.’ This will allow you to screw your dowel in place.
- Place your T-joints on the tops of your supports and secure them with epoxy.
- Feed the dowel through the T-joints and secure it with screws through the top of the T-joint.
- Add 4 1-inch sections of copper pipe to each end of the T-joint to further secure your dowel.
Using this method gives you more flexibility on the shape and size, but it’s likely to cost a little more. However, you’ll end up with parallettes that look more professional and will last a lifetime. Although these measurements are to make standard-sized parallettes, you can always make slightly longer ones based on the exercises you intend to perform. More advanced gymnasts may require a more extended bar.
If this is the case, ensure that you purchase strong enough material to hold your weight so that it won’t bow in the middle. Stronger woods are available – maple wood being the favorite for most manufacturers, or even metal piping may work a little better.
HOW TALL SHOULD PARALLETTES BE?
If you’re just starting with parallettes, it’s advisable to make the top bar around 7-inches from the floor. This allows for lots of room to place your hands underneath and gives you enough lift off the floor to provide you with a good workout.
Making them shorter than this will mean that you don’t give yourself enough lift during certain exercises to make your workout worthwhile. L-sits are one of the first exercises that you’ll learn to do using parallettes, and at first, you won’t be able to get your legs up parallel with the bars as intended.
But you’ll need to have enough room for your legs to drop a little below the bar without them touching the floor – otherwise, you’re not working your muscles properly. For more experienced gymnasts, they may want to do handstand push-ups, which would require them to dip their head below the bar, so those 7-inches allow for a little space, ensuring you don’t bang your head on the floor.
Read More:
- Best 3 Peloton Elliptical Reviews
- Best 3 Incline Treadmill Reviews
- Sole F85 Treadmill Reviews
- Top 3 Matrix Treadmill Reviews
- Best Elliptical Machines Under $500: Top 5 Options Reviewed
PARELLETTE WRIST FORM AND SPACING
One of the first things you’ll need to perfect when you start using parallettes is your wrist form. When you’re gripping the parallettes, you should have your thumb underneath the bar and all four fingers wrapped around the other side.
Your wrist should then show a perfectly straight line from the parallettes’ top bar to your shoulder. This will allow you to get the distance right between the parallettes before your start your workout.
You should never have to bend your wrist in at a 45-degree angle to reach the parallettes comfortably. If you’re noticing this, move them closer together. If you don’t get your form right, you may break your wrists.
PARALLETTE EXERCISES
Parallettes provide an intense workout, but if you’re new to the game, you’ll need to build up slowly.
- Parallette Dips
Sit between the parallettes will your legs straight out on the floor in front of you. Grip the parallettes on either side and push your upper body upwards, leaving your feet on the floor at a 45-degree angle. This will target your triceps.
You can either leave yourself in this sitting position or if you’re feeling a little braver, let yourself back down until you’re almost touching the floor again, then push back up, creating a backward push-up. Read Here: Best Ab Machines at Home: Top 5 Most Ripped Review
- Parallette Push-ups
Parallette push-ups are designed to target your back and shoulders. You’ll need to put yourself into a push-up position, holding onto the parallette bars rather than placing your hands on the floor. Your arms should be directly below your shoulders, creating a straight line when you push up.
- L-sits
Now you’ve got the hang of those; you’ll want to activate your abs and core muscles. L-sits start with you sitting in between your parallettes on the floor, legs out straight in front. Push yourself off the floor, holding your legs parallel to the floor and pointing your toes to keep your balance.
Hold yourself there for 10 seconds, and gradually build up the time as you get stronger. You could even try pushing up and down in this position when you get more confident but remember that it’s vitally important to keep those legs straight to engage your core and work on your balance.
- V-sits
Adding some hip exercises into the mix, a V-sit is a progression of the L-sit. It’s in the same starting position; however, once you’re in the air, your aim is to get your legs a little higher, creating the ‘V’ shape with your body. Slowly lift your legs progressively higher each time. You want to get your knees in line with your chest and feet in line with your head if possible.
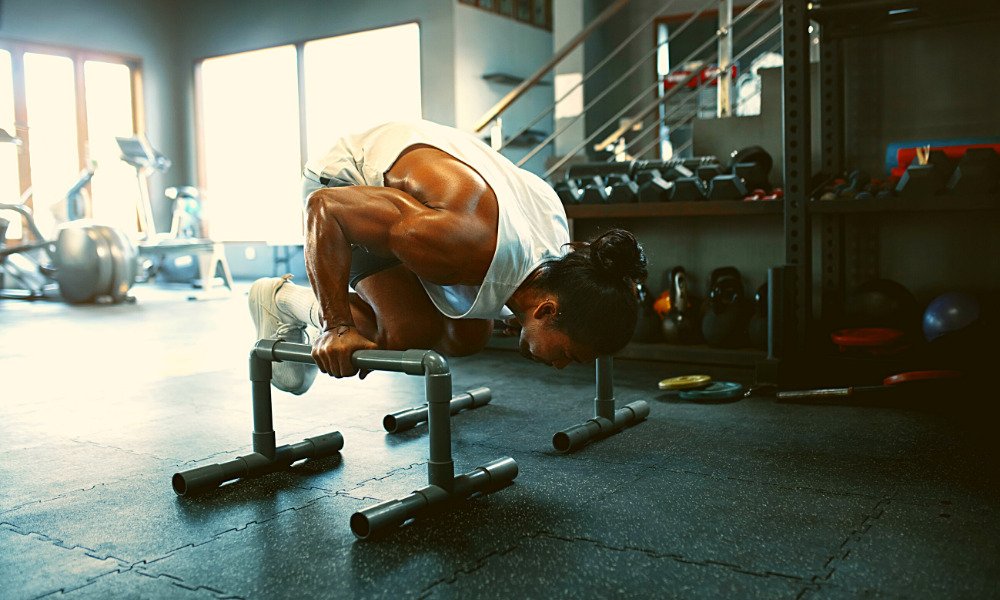
- Parallette Planche
Turn, so you’re facing the floor in the push-up position. Then, pushing all your body weight forward into your shoulders, lift your legs slowly off the floor. You may need to spread your legs a little for balance. Aim to get your body completely straight in the air, relying on your arms and shoulders to hold you in position.
- Handstand Push-ups
One of the most advanced parallette exercises is the handstand push-up. You’ll need to start in the standard push-up position and gradually move your legs in towards your chest and raise them, so your legs are in the air. Your aim is to get your legs pointing directly upwards, relying on your chest and arms to stabilize you.
Once you’ve got that mastered, gently bend your elbows and push your shoulders forward to dip your head below the level of the parallettes. (You’ll need to push your head forward slightly and legs out behind you to avoid hitting the floor). Then return to the original straight position.
Make sure you work gradually up to this to avoid injury.
Read More:
- Best 3 Peloton Elliptical Reviews
- Best 3 Incline Treadmill Reviews
- Sole F85 Treadmill Reviews
- Top 3 Matrix Treadmill Reviews
- Best Elliptical Machines Under $500: Top 5 Options Reviewed
THE BENEFITS OF PARALLETTES
- Portable
Because of their size and shape, parallettes are easily portable and perfect if you want to take a vacation but keep up your fitness while you’re there. If you’re making DIY parallettes, it’s even easier for you to customize the shape so that they fit into your luggage more comfortably. Read Here: Best Barbell for Home Gym Workouts Reviews
You can even move them around your home too if there’s a solid surface beneath. Some people don’t have enough room to set up a complete gym in their homes, but with DIY parallettes, it’s easy just to move to another empty space when you need to.
- Cost-effective
Parallettes are one of the most cost-effective options for getting fitter. Gymnasts who use them regularly are known to be some of the strongest sportspeople in the world from calisthenic exercises. DIY your own version of parallettes from tools you already have around your home might cost you as little as $15.
- Storage
If you have a small home and you’re struggling for actual gym space, parallettes are a great option as they hardly take up any space at all, and they give one of the best all-around workouts. You can work your arms and core all on parallettes without having the massive burden of having to store weights.
SUMMARY
If you’re looking for a simple piece of gym equipment for your home, DIY parallettes are the perfect option. They’re small, so they’re easy to store and travel with, but they also provide a great workout.
They’re reasonably easy to make yourself with things that you have in your own home, so they’re an excellent choice if you’re on a budget. You’ll save yourself all that time and money on gym trips but still build the muscles and get the body shape you’re looking for.
Read More: