Battle ropes are great workouts exercise for burning calories and losing fat. Thirty minutes of battle ropes at maximum intensity burns as many, if not more, calories than many common forms of exercise can burn in twice that time. We’re all on the lookout for the cheapest and best alternatives to expensive gym equipment. Staying fit is essential, but normally, it comes at a pretty high cost. However, there are lots of things that you can do in your own home to cut costs and stay healthy. Creating DIY battle ropes gym equipment is easier than you think, and it’ll cost you next to nothing, as you’ll typically be able to use items that you have in your own home already. Read Here: Best Shoes for Jumping Rope For Men & Women: Our 6 Top Picks
Read More:
- Best 3 Peloton Elliptical Reviews
- Best 3 Incline Treadmill Reviews
- Sole F85 Treadmill Reviews
- Top 3 Matrix Treadmill Reviews
- Best Elliptical Machines Under $500: Top 5 Options Reviewed
WHAT ARE BATTLE ROPES?
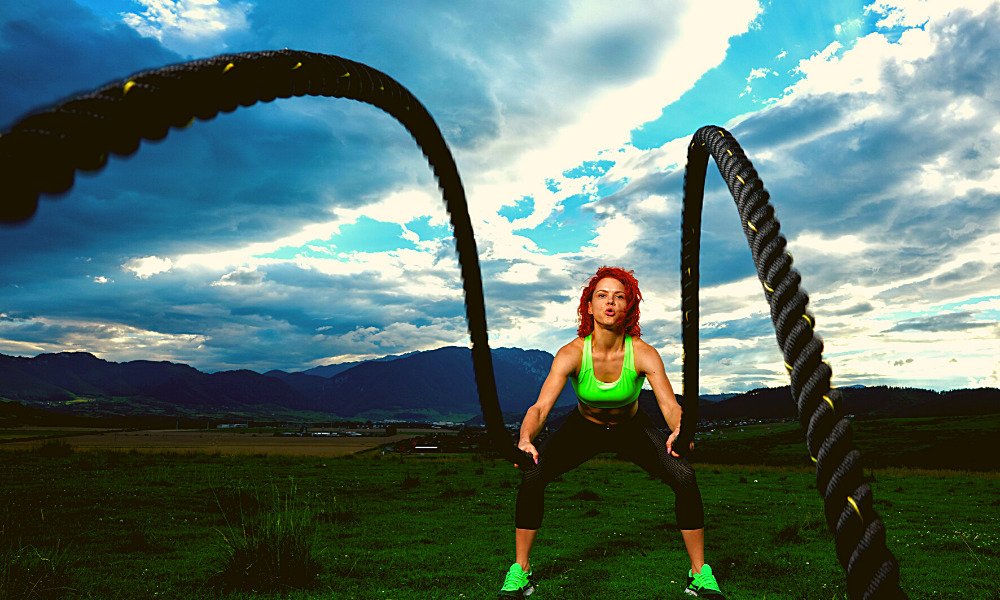
SIY battle ropes are one of the most accessible pieces of equipment out there to replicate on a budget, and they are also one of the cheapest. Invented by John Brookfield and tested using professional NFL players, they are designed to increase your endurance and develop a full-body workout. They are large, heavy-weight ropes that can be swung around, up and down, or lifted in different routines to give you a versatile workout.
They’re designed to work your arms, back, chest, legs, and core depending on the exercise regime you have in place, so they’re an excellent all-around workout tool. They can be used to develop muscle mass depending on the power of your swing.
They’ll also create a great extension to your cardio routine depending on which battle rope exercises you incorporate and the speed at which you choose to use them. Because of the high-intensity training that they provide, they’re an excellent weight-loss tool too.
HOW TO MAKE DIY BATTLE ROPES
There are a few different ways that you can easily DIY your own battle ropes from things that you have around your home already. If you purchase a professional set of battle ropes, specifically for gym purposes, they could set you back around $150. So, making them yourself could save you a considerable chunk of cash.
Before you begin on your DIY mission, make sure you have a designated area ready for your battle rope workout. To gain the full benefit of using battle ropes, you’ll need an open space of around 10-15 feet. Remember that you’ll be swinging the ropes around, and you don’t want to hit anyone or break anything.
GARDEN HOSES
Most people will have a garden hose already in their yards, but if you don’t happen to have one, you can pick up one to repurpose from the store at around $15. The great thing about this method is that you can increase the weight gradually as you go along.
When you first start your workout, the hose itself might be perfectly fine – no need for modification. They’re pretty heavy on their own, after all. However, as you start to get stronger, you’ll need something that packs a little more punch. Read Here: Best Folding Rowing Machines: Top 7 Editor’s Picks
- Cut off the ends of your hose so that you have a flat edge to work with that you could easily pick up and throw around.
- Cover off one end with duct tape.
- Empty dry play sand into the hose using a jug. (This may take a while, as you’ll need to keep moving the hose to ensure you get all the sand down through to one end). However, it’s not the end of the world if you get a little backed up – the more you use them, the more the sand will disperse evenly. Plus, the uneven nature of the sand could even benefit your balance too.
- Once you’ve added as much sand as you need, cover off the other end with duct tape. You can even add more sand gradually as you get stronger.
- If you’re struggling with grip, you could use sports grip tape to wrap around the first foot of the hose that you intend to hold.
Read More:
- Best 3 Peloton Elliptical Reviews
- Best 3 Incline Treadmill Reviews
- Sole F85 Treadmill Reviews
- Top 3 Matrix Treadmill Reviews
- Best Elliptical Machines Under $500: Top 5 Options Reviewed
FIRE HOSES
The fire department has a steady stream of fire hoses coming through their doors, and the old ones need to be decommissioned after a while due to health and safety regulations. If you contact your local fire department, they may let you take a couple of the old ropes away.
- Cut off the metal endings as you did with the garden hose.
- The fire hose itself will be extremely heavy, so you may be able to use them just as they are.
- Once you get strong enough that your fire hose is easy – start to fill it up with sand too.
- Tape the ends off with duct tape as you did before.
Whether you’re using a garden hose or a fire hose, remember that you can cut it to an appropriate length if you feel that it’s too much. The beauty of DIY battle ropes is that you can tailor them to your exact specifications.
WHAT ARE THE BENEFITS OF BATTLE ROPES?
- Full Body Workout
Because they are such a great way to develop your natural fitness and work on a whole host of muscle groups simultaneously, you can get a full-body workout without having to purchase lots of different and costly pieces of equipment.
- Storage
They’re a one-stop shop when it comes to a workout, so yes, they do need some storage space, especially if you happen to have thicker ropes. However, they won’t need anywhere near as much space as the multiple pieces of high-tech equipment that you’d need to create an alternative full-body workout.
- Cost-effective
They’re so easy to make yourself, so you could create an effective pair of battle ropes for under $20 – and that’s only if you didn’t have the equipment in your home already.
- Improves Balance and Coordination
Not only do battle ropes work on your cardio and all your different muscle groups, but their heavy and uneven weights, depending on your swing, will help you to develop your balance, flexibility, and coordination.
- Fun
There are some days when you just can’t drag yourself out of bed to do that intense workout. But battle ropes change that feeling. They have been identified as one of the most exciting workout tools out there. Their versatility means that you can make a fun and different routine for every day of the week so you’ll never get bored.
- Suitable for Everyone
Your DIY battle ropes can be customized in weight to meet your abilities and your preferred exercise routine. This means that they’re a fantastic workout tool for everyone regardless of gender, height, weight, or reason for the exercise.
Read More:
- Best 3 Peloton Elliptical Reviews
- Best 3 Incline Treadmill Reviews
- Sole F85 Treadmill Reviews
- Top 3 Matrix Treadmill Reviews
- Best Elliptical Machines Under $500: Top 5 Options Reviewed
BATTLE ROPE EXERCISES
Let’s start small and build up. There are so many different routines that you can do with your battle ropes, but you’ll need to master the basics first.
WAVES
There are a couple of types of wave motions, and each works with different muscles.
- Alternating
To work the whole upper body – mainly your biceps. Take an end of a rope in each hand and lift your right and left alternately. Try to lift as high as possible, planting your feet shoulder-width apart and bending your knees.
- Sideways
To focus the exercise on your chest, take the same feet apart stance, but bring your hands together simultaneously. You’ll need to pass one hand over the other, then push your arms outwards. Try to alternate which hand is on top when you cross over and spread your arms as far as possible when you push out to intensify your workout.
- Two-handed
To engage your core and increase stability, you’ll need to conduct the up and down wave motion that you had with alternating waves but move your hands simultaneously. Really slam the rope down to the floor each time to increase the power of the wave.
SWINGS
There are a couple of swing exercises you can do once you’ve mastered waves.
- Clockwise
Move your arms in a circular motion clockwise. You can either do this with a single rope and switch hands midway through or try two ropes simultaneously. Try to grow and lessen the circles throughout the workout to ensure you’re engaging all your muscle groups. You should feel it in your arms, legs, and chest.
- Counter- clockwise
Is the same exercise as above but the other way. It would be best if you tried to do both clockwise and counter-clockwise in the same workout session to ensure an even tension on both arms.
- Alternating
An alternating swing involves using both ropes and moving one arm clockwise and the other counter-clockwise. You’ll need to get your timing just right here – it’s excellent to improve your coordination. If you don’t time it correctly, the ropes will clash in mid-air. The trick is to move one hand toward the center of your body and, just as that one is about to move back out, pull the other hand in. Try to get a rhythm going. Read Here: 10 Best Treadmill Workouts You’ll Love
Read More:
- Best 3 Peloton Elliptical Reviews
- Best 3 Incline Treadmill Reviews
- Sole F85 Treadmill Reviews
- Top 3 Matrix Treadmill Reviews
- Best Elliptical Machines Under $500: Top 5 Options Reviewed
SLAMS
Slams are the next step on your battle rope ladder.
- Power Slams
Power slams work in the same way as the waves that you’ve already practiced. However, while waves focus on building your speed to increase cardio, slams depend on the amount of power you use to slam that weight to the floor.
- Ski Slams
Ski slams require you to lift your arms in the air and bring them down to the side using all your power. Your arms will end up out to the side of you – ropes apart. The motion mirrors a ski-slope angle. This is great for your lower back, quads, and glutes and, depending on speed, can really be a good cardio workout too.
- Jumping Squat Slams
Go into the squat position and create the regular squat repetitions, but when you reach the standing position, jump into the air, raising both ropes with you and slam them back to the floor using all your power.
JUMPING JACKS
This is precisely what it says on the tin. Perform jumping jacks while you’re holding both ropes. The extra weight of the ropes will pull on your shoulders and give you a great cardio workout.
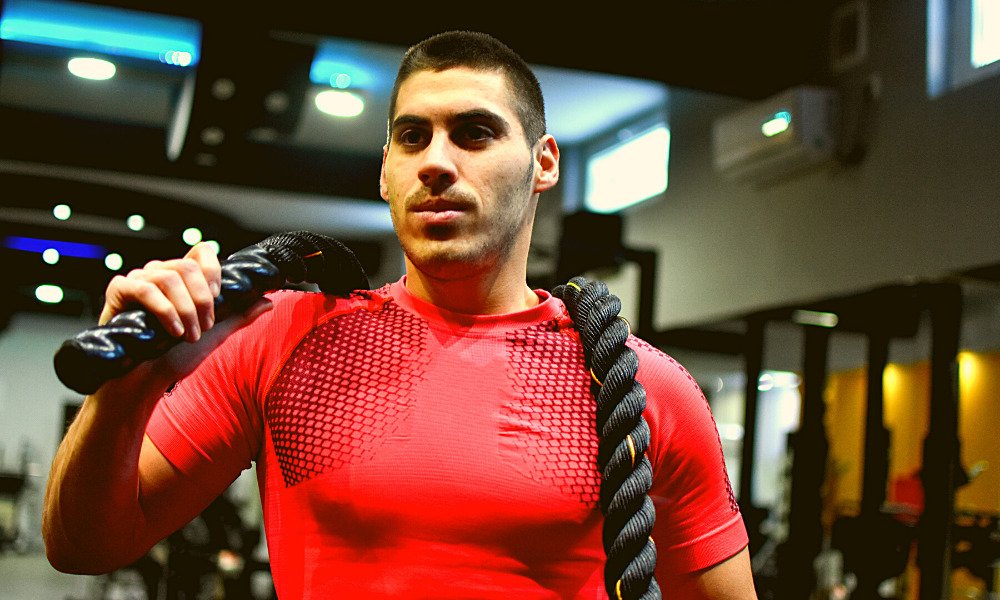
FIREMAN’S CARRY
You can even use a battle rope for weight training. Coiling the rope up so it hangs over your shoulder while running will help your functional strength. You can do this with one or both ropes.
HOW LONG SHOULD THE BATTLE ROPE WORKOUT BE?
You’ll want to work up to doing all of these exercises in succession to get the most benefit. It would be best to do each exercise for a minute, with a 30-second rest in between. Stretch this to a minute if needed.
Once you’ve cycled through all of the workouts, you can start from the beginning after a 5-minute break if you still have energy left. If you’re looking to develop or tone a particular area, incorporate a couple of minutes of the exercises that focus specifically there before moving on to the next.
OTHER BATTLE ROPE REPLACEMENTS
Battle ropes are a fantastic addition to your home gym and cheap to make. But if you’re looking for something a little different, there are a few other DIY pieces of gym equipment that would be great for you to try out.
Cut a hole in the top of a basketball and fill it with sand. Seal it with duct tape and use this to lift.
- Water Balls
To improve balance, add water to the inside of a basketball and use this for core lifting exercises.
- Kettlebells
Fill a basketball or soccer ball with cement and add a handle made of piping. Wait for the cement to fully dry, and you have your own kettlebell to lift.
- Dumbbells
Start with lifting heavier items such as books or food cans. You can even place these in bags to help your grip as you work your way through the weight classes.
Read More:
- Best 3 Peloton Elliptical Reviews
- Best 3 Incline Treadmill Reviews
- Sole F85 Treadmill Reviews
- Top 3 Matrix Treadmill Reviews
- Best Elliptical Machines Under $500: Top 5 Options Reviewed
SUMMARY
Battle ropes are the ideal addition to any home gym – they may even be your whole home gym. They’re so versatile, easy to create, and simple to work with, even as you progress with your fitness level that you might not even need any other equipment.