Barbell weights are very flexible and can be used to perform a wide variety of exercises. Having a barbell rack in your home gym is everyone’s dream. It means there’s no need to drag yourself up at 5 am to make it to the gym before work, and it can also be incredibly cost-effective as you’re saving on gas and gym membership fees. However, there may be significant costs involved in setting up a home gym if you need to purchase all of that fancy equipment. Instead, you can DIY your barbell rack to keep your cost lower and save some money. Many gym items can easily be constructed from things that you already have around your home. DIY gym equipment works just as well and will save you a lot of money and time in the long run.
Read More:
- Best 3 Peloton Elliptical Reviews
- Best 3 Incline Treadmill Reviews
- Sole F85 Treadmill Reviews
- Top 3 Matrix Treadmill Reviews
- Best Elliptical Machines Under $500: Top 5 Options Reviewed
BARBELL STORAGE
It’s not just the equipment itself you’ll need to think about; you’ll also need to consider where you’re going to store it. There are limitless different storage solutions to suit any household to keep you safe and your equipment looking brand new.
And the best thing about using a DIY solution is that you can tailor your storage to your own home, so if you’re limited on space, you can create something to fit your exact measurements.
A barbell rack will act as your place to store your barbell when you’re not using it but also doubles up to become part of your workout routine, allowing you to rest your barbell at certain comfortable heights.
It comes in the form of a large frame, usually with 4 ‘legs.’ As the lifter, you’d stand in between the legs of the structure and lift the weight to the desired heights, where there would be a rest area or ledge for you to place the weight bar, should you need to.
BARBELL RACK USES
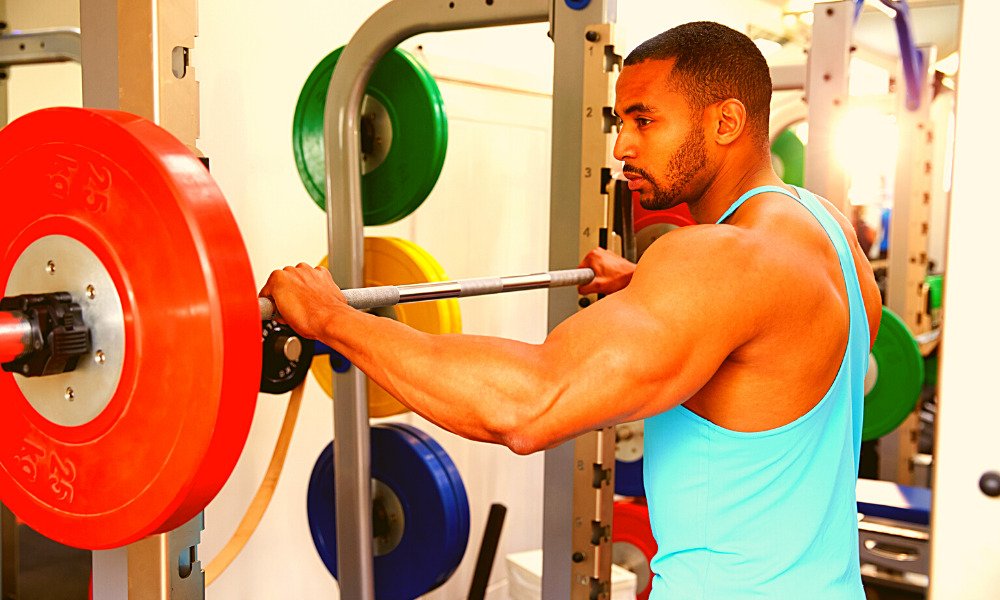
Barbells are made up of a single bar tipped with two equal weights. They’re great for squats and deadlifts, especially if you’re weight training, and they are generally seen as a more specialized piece of equipment for weightlifting due to the muscle groups they focus on.
In the gym, you’ll usually have a spotter when lifting weights to ensure your form is correct (and not leaning to one side) and to make sure you’re safe if the weight gets a little too heavy.
However, in your home gym, you’re more likely to be working out alone, so it’s essential to ensure you still maintain that safety and security as no one will be around to help you if you do injure yourself.
- Artificial Spotter
Barbell racks are the ideal piece of equipment to act as a ‘spotter.’ They’ll allow you to set rest spaces in your workout, so if you do feel that the weight is getting a little too much, you don’t need to drop the weight to the floor or risk injury.
- Motivational Prompt
They can also act as a target. You know what height you want to reach, and that rest space to aim for can help push you just that little bit further if you need some more motivation.
- Even Lifting
The fact that your barbell has rest spaces at the same height on both sides of the rack will keep your lifting even. When you first start lifting, it’s natural to lean to one side because you’ll always have a stronger favored arm.
Your aim with a barbell is to even out that strength so that your physique will look symmetrical. Using a barbell will ensure that the weight is distributed evenly across your arms, back, and chest.
- Storage
When you’re done for the day, you’ll need a space to store your weights – preferably not on the floor. If you live in an apartment, the floor may not necessarily be designed to take a heavyweight if the pressure is focused on a single area. This might cause floor damage or may even be dangerous for the people living below you if you’re in an apartment building.
Creating a barbell rack will distribute the weight over a larger area, allowing the frame to settle across more of your room. When you place your barbell on there, it will be just as heavy, but a wider section of your floor will take the strain.
Read More:
- Best 3 Peloton Elliptical Reviews
- Best 3 Incline Treadmill Reviews
- Sole F85 Treadmill Reviews
- Top 3 Matrix Treadmill Reviews
- Best Elliptical Machines Under $500: Top 5 Options Reviewed
HOW TO MAKE A DIY BARBELL RACK STEP-BY-STEP
There are a few different ways that you could create an excellent barbell rack from the materials around your own home.
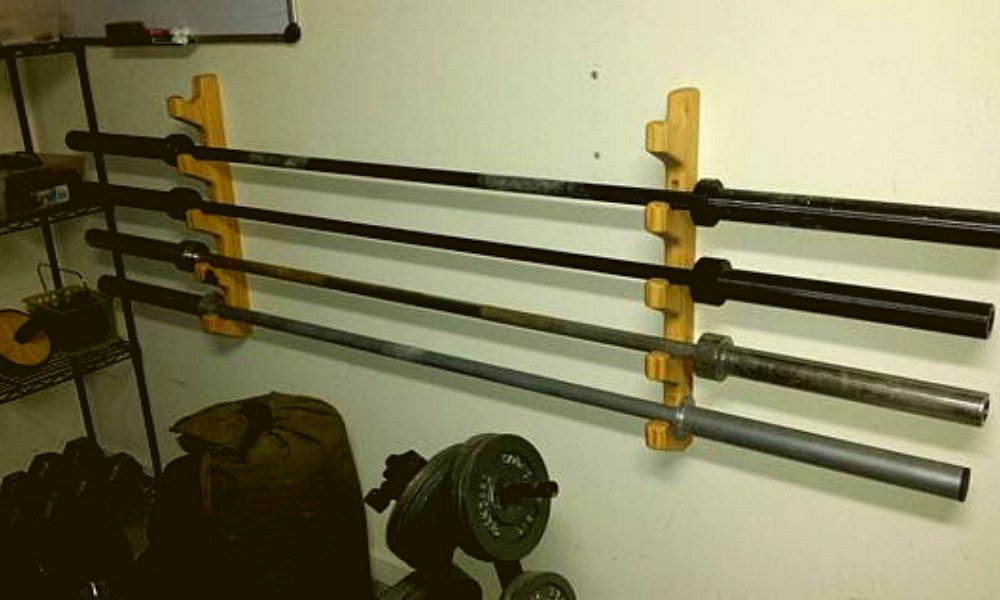
- Extended Wall Frame
If you haven’t got a lot of space in your home, this is a great option.
Materials:
- 2 x planks of wood, 6-8 inches wider than your shoulder span.
- Four 2 x 4 pieces of wood.
- 2 x wooden planks (18- 24 inches in length).
- 2 x wooden planks for the legs (ideally at least 6 inches above head height).
- Heavy-duty drill with a variety of drill pieces.
- Metal piping (for the hooks to hold your weight – depending on your intended rest spaces, you might want just 2, but up to six will work).
- Heavy-duty screws.
- Bolts.
- Metal adhesive.
- Hand saw.
- Take your 2 x 4 pieces of wood and screw them into each end of your 6–8-inch pieces, so you end up with two ‘n’ shapes.
- Take a 6–8-inch wooden piece and secure it to the wall above the skirting in the place where you intend your rack to stand. This will leave the 2 x 4 pieces pointing outwards.
- Measure your long planks for the legs and select the heights where you’re most likely to want to rest with your barbell. Mark them off with a pencil on both planks so that they match.
- Take a corner of your metal pipe (this will act as a hook for your weight to stop it sliding off). You’ll need to measure, so all of your pipe pieces are the same length and all end with an upturned edge, like a hook.
- Measure the pipe’s diameter and drill a hole in each piece of wood at the marked heights to slip your pipe in comfortably.
- Use metal adhesive to hold your pipe in place, allowing a small section of the pipe to extend through the back of the plank.
- Use a heavy-duty screw or bolting mechanism to secure the pipe behind the wooden plank to hold the hook in place.
- Repeat in several positions if you’d like more than one rest place.
- Take the other 6-8-inch piece and secure it on the wall directly above the first one at the same height as the top of the leg planks.
- Take your 18-24-inch pieces and screw them into each of your 2 x 4s that are sticking out from the wall. You should now have four arms protruding from the wall, which will hold up your leg planks.
- Simply screw the leg planks onto the side of each of the wooden arms to secure them in place.
Pros:
- Because it’s using your wall as a counter-balance for the weight, it’s incredibly strong and could be used to store multiple weights if needed.
Cons:
- Once it’s there, it’s there; there’s no moving it.
- It doesn’t look very pretty.
- There are some materials that you may not have around your home.
- Bucket Rack
This method is simple and requires the least technical knowledge; however, it doesn’t look too aesthetically pleasing, so it’s best if you don’t plan to show your homemade gym to anyone.
Materials:
- 2 x 5-gallon paint buckets.
- Cement mix.
- 2 x wooden planks (at least 4 inches in width). The height may vary depending on how tall you are and where you need the barbell to rest.
- Empty your paint buckets and mix the cement based on the guidelines.
- Ensure your wood is cut so that both planks are the same size. Ideally, this should be around 6 inches below your head height.
- Saw a ‘V’ shape into the top of both pieces of wood. This will give you a place to rest and store your barbell.
- If you choose wider wood for your legs, you may also be able to cut a few more V shapes, slightly off to the side out of the length of the wood. These will allow you to hold your barbell at a different height.
TOP TIPS
Be careful not to cut too far into thin pieces of wood, as this will damage the integrity and may mean that your rack falls over. Only cut at different heights if you’re using thicker wooden planks that can support the weight.
Also, ensure that you cut your Vs into each wooden plank at precisely the same height; otherwise, your barbell obviously won’t stay on.
- Place one plank into one bucket, right to the bottom and ask someone to hold this straight while you pour in the cement to hold it in place.
- Hold the plank in place for around 10 minutes to ensure it sets upright. Then leave to dry completely for at least 8 hours before use.
- Repeat with the second bucket.
- When storing away your barbell, place it in the top V of your rack.
Pros:
- It’s one of the cheapest options.
- You need little to no technical knowledge to make this style.
- There are few materials needed.
- Because the two legs aren’t attached together, you can move the rack around easily.
Cons:
- It doesn’t look very professional.
- It may require two people to hold the planks in place while the cement sets.
Read More:
- Best 3 Peloton Elliptical Reviews
- Best 3 Incline Treadmill Reviews
- Sole F85 Treadmill Reviews
- Top 3 Matrix Treadmill Reviews
- Best Elliptical Machines Under $500: Top 5 Options Reviewed
BARBELL RACK MAINTENANCE
Treating and sanding down your wooden frames regularly is a necessity. It allows you to find and fix any potential damages quickly before the structure is compromised and means that you’re kept safer from splinters or stray pieces of wood that may cause injury.
If you start to hear any creaking or feel any movement in the rack when you place your barbell on, then it may be time for a replacement. While homemade barbell racks are a great money saver, they may not necessarily last as long unless you’re a professional carpenter, so always be on the lookout for wear and tear.
OTHER POSSIBLE DIY GYM EQUIPMENT
- Dumbbells
Dumbbells can be created out of anything and everything. To start off with, you need to use heavy objects within your home. Books or canned foods are a good starting point. You can then use multiple books and cans in bags to increase the weight over time and ensure they’re easy to handle. Read Here: Best Adjustable Dumbbells
If you’re looking for a more permanent solution with an easy-grab handle, you could use water cooler bottles. These are easy and comfortable to lift and can be made heavier over time by simply adding more water.
- Battle Ropes
Battle ropes are a simple piece of equipment to make yourself, but they’re incredibly effective due to their versatility with exercises. You can tone your abs, arms, legs, back, and shoulders with just a simple rope, just by changing up your activities. They even make a great cardio workout. Read Here: DIY Battle Ropes – How to Make Your Own Battle Ropes
To make your own battle ropes, simply fill an old hose pipe with sand and use duct tape on each end to hold the sand in. You’ll be able to increase the weight over time as you get stronger, and the uneven distribution of sand inside will even improve your balance.
- Kettlebells
A kettlebell is great to increase your lifting abilities and improve your balance and tone your core, but buying a professional one could set you back quite a lot of money. Instead, you could cut a slit in the top of a basketball or soccer ball and fill it with cement to the desired weight. You’ll then be able to use plastic or metal pipe filled with sand as the handle. Using PVC piping will allow you to bend it easily when it gets a little warm, so you can tailor the handle to your grip size. Read Here: DIY Kettlebells for Under $8 in 6 Easy Steps
- Medicine Balls
Medicine balls are great for your abs, biceps, and triceps, depending on the exercises you choose. You could cut a small hole in the top of the basketball and fill the hole with sand. Sealing the hole with duct tape will then allow you to regularly change the medicine ball’s weight if you want to add more sand later on.
This may even mean that a DIY medicine ball is more convenient and cost-effective than a store-bought one, as you can make it heavier as you get stronger without having to replace it. Read Here: Best Medicine Balls for Slamming: [Buyers Guide]
Read More:
- Best 3 Peloton Elliptical Reviews
- Best 3 Incline Treadmill Reviews
- Sole F85 Treadmill Reviews
- Top 3 Matrix Treadmill Reviews
- Best Elliptical Machines Under $500: Top 5 Options Reviewed
DIY Barbell Rack: SUMMARY
Making your own barbell rack can seriously reduce the cost of setting up a home gym, and you’ll be able to tailor it to your exact specifications, rather than having to make do with store-bought, standardized equipment.