Amazing Sporting Adventures
Building your own workout bench at home is a great way to save yourself some time and money. Once you have a workout regime arranged in your head, all your need is a few pieces of wood and a place to build it, and you’re all set. Read Here: 5 Best Weight Benches for Small Spaces
It’s an excellent way to maintain your motivation too, as you’ll be working out using something you made with your own two hands. There are a few different types of workout bench that you could make depending on the kind of workout you intend to do. Here we are going to show you step by step how to build a workout bench out of wood in your home.
Read More:
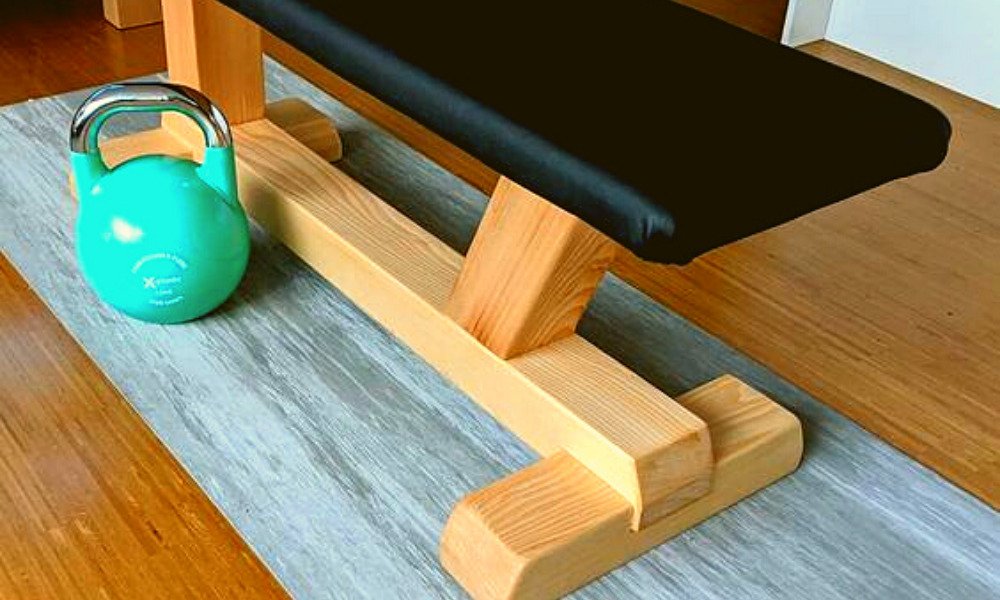
WORKOUT BENCH PRESS
Materials:
- 2 x 4 x 8-inch wood
- 49-inch x 10-inch plywood
- 2.5-inch constructions screws
- 1-inch-thick closed-cell foam
- Marine fabric foam
- 0.5-inch staples
- Standard wood nails
- Drill
- Staple gun
- Nail gun
- Hand saw
- Take your 2 x 4-inch wood and cut it into two lengths—one of 48-inches and the other of 24-inches.
- Cut both ends of the 24-inch section at a 45-degree angle.
- Take the 48-inch section and attach it to the 24-inch piece around halfway down using a couple of construction screws. This should make a ‘T’ shape and will become the main weight-bearing section to hold your weights when you’re not using them.
- Cut a 10-inch section of wood and shave off both ends to a 45-degree angle to create a support for your leg.
- Screw one end of this piece into the bottom 24-inch section and the other into the 48-inch section so that your wooden legs have support for when the weight is placed up there later.
- Create another leg in exactly the same way.
- Use another 48-inch piece of plywood to connect the two legs together from the bottom. You’ll need to attach this to the opposite side of the legs to support it.
- You’ll then need to strengthen your legs to ensure they have enough weight that they don’t tip over when holding your weights. To do this, screw a 20-inch section of wood to the front of each leg to double the legs’ width.
- Add a third layer of wood of up to 22-inches just in front of this.
- You’ll then need to cut two more 10-inch supports, as you did for the backs of the legs, and add them to the front of each leg. This will counter the tipping weight and ensure that your structure doesn’t fall over forward.
- You should now have a structure with larger legs at the back and a smaller leg at the front with a slightly shorter mid-section. This section is where you’re going to rest your weight when you’re done lifting.
- Now, to make the bench. Take two 16.5-inch pieces of plywood and screw them on either side of a 13-inch piece. This should give you a ‘H’ shape.
- Repeat to get the other leg.
- You should then have enough space in the top of your H to slot in a 40-inch plank of wood, which will support your seat. Screw this in place so that your legs are attached together.
- Place your 49-inch plywood across the top of this and screw it in place all along the seating area to secure it. It’s a good idea to leave it a little off-center so that the wood leans off one end further. This will be the end that goes underneath your weights on the bench and gives you more space to lift.
- Making the bench comfortable should be your next priority. Add your marine fabric foam in two layers over the top of your bench seat. It’s a good idea to use some construction glue to begin with and then a staple gun to ensure it doesn’t move.
- You should then wrap your foam seat with a wipeable fabric (so it doesn’t matter if you sweat). Attach underneath using your staple gun.
Read More:
FLAT WEIGHT BENCH
To create your standard, flat weight bench, you’ll need to take a quick trip to the DIY store.
Materials:
- Wooden 4 x 4
- Wooden 2 x 12 (You can purchase to be a little thinner based on preference)
- A 50-inch flat, wooden section to make up the benchtop
- 7- tie plates
- Construction screws
- Cut your wood down so that you have two 10.5-inch wooden sections and two 14.5-inch sections. These will make up your legs.
- You’ll then need to cut your 2 x 12 into a length of 40 inches.
- Place your 10.5-inch sections on top of the 14.5-inch pieces to make an upside-down ‘T’ shape.
- Bend four tie plates to a 90-degree angle. They should bend pretty easily against the corner of a workbench or table.
- Use your screws to secure the tie plate on either side of the T shape. You’ll need to use at least four screws on each side of each piece of wood to ensure it can’t move. Remember, it’s going to need to hold your weight.
- Repeat on both leg sections.
- Place the 40-inch pre-cut section across the top of your two legs, forming a sort of ‘n’ shape with feet.
- Use two more tie plates on either side to secure the top wooden beam to the legs using at least four screws in each section of the tie plate.
- Place the 50-inch wooden top across the top of your beam and center it.
- Use the remaining tie plates at a 90-degree angle to secure the top. Use at least two tie plates on each side.
How to build a workout bench out of wood
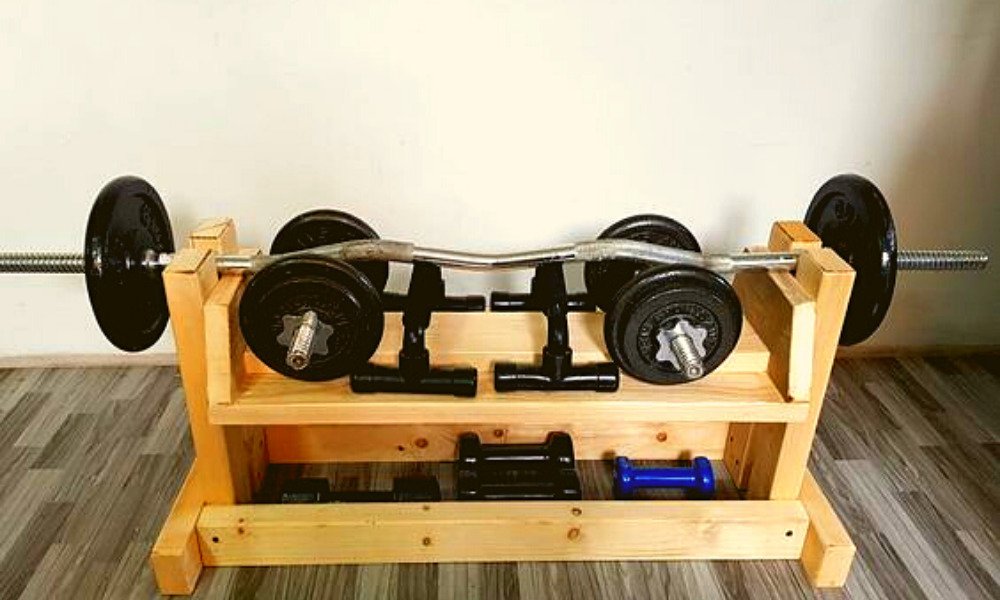
MOVEABLE WEIGHT BENCH & STORAGE FACILITY
When you’re trying to kit out your home gym, it’s understandable to be a little short on space. Your rooms weren’t built to make a gym, after all. One way to overcome this is to ensure that you create storage space when you’re making your equipment.
A workout bench is a perfect opportunity to build in that extra space.
Materials:
- 48 x 12-inch plywood
- 48 x 16-inch plywood
- 12 x 16-inch plywood
- Wooden 2 x 4 (16-inches long)
- Wooden 2 x 4 (12-inches long)
- Wooden 2 x 4 (48-inches long)
- Staple gun
- Cushioning foam
- Wipe clean material
- Construction screws
- 4 x wheels
- Hinges
- If you have all the above wood sections, you should have enough pieces to make a box shape. Start with the bottom; select a 48 x 12-inch section.
- Take one of the 48-inch pieces of 2 x 4 and cut down the corners at a 45-degree angle. Screw this along one of the long edges.
- Repeat on the opposite side, then add two of the 12-inches pieces (again with the 45-degree edges) to the shortened sides.
- To ensure its security, you might want to flip the wood over and use the staple gun to strengthen the join.
- Take one of the 12 x 16-inch pieces of plywood and screw this, pointing upwards onto the 2 x 4 on the shorter edge. Then do the same with the other three sides to make a box.
- Staple the appropriate pieces of 2 x 4 on the inside corners to attach the sides together, then screw them in place to reinforce the strength. You should now have a box without a lid.
- Screw some final 2 x 4 strips onto the inside of the box on the top edge along three sides – missing out on one of the long edges. This will be where your lid rests.
- Take the final piece of 48 x 12-inch plywood and add two hinges to one of the long edges.
- Cover the lid with foam using glue to secure, then add some wipe-clean material to cover your foam.
- Staple the material to the underside of the box lid – avoiding the hinges.
- Flip the box upside down and screw in a wheel to each corner. This will give you more flexibility in your room as you’ll easily be able to move it around.
- Attach the hinges to the box on the side without the ledge.
You should now have a moveable, hollow box that’s just the right height for weight training and gives you more storage space when you’re done working out.
Read More:
OTHER OPTIONS
You can also make a temporary weight bench out of household items that you already have laid around—no need to be a master at DIY and no extra costs involved.
Why not try using your garden benches for a flat bench-press bench. If you have a bench that’s the right height for your weights, then there’s no need to create your own.
Strong coffee tables can also work, but it’s best to use an old coffee table – you don’t want to drop your weights on there and damage it accidentally.
Other DIY Workout Equipment
Now you have the perfect workout bench, and you’ve saved yourself a ton of money by making it yourself. All you need is the actual weights to make use of your bench. But the weights themselves can be incredibly expensive.
The very reason you made your own bench is to save some money, so why not do the same for the weights? There are several ways that you can make your own weights, and they work just as well.
Dumbbells
Water bottles make excellent dumbbells and are easily adjustable to cater to your growing strength. If you find two water cooler bottles and start by filling them with a small amount of water or sand, you can lift them by the handles like any other weight. Read Here: Best Adjustable Dumbbells
You’ll then be able to add more water or sand as you get stronger. It’s the cheapest way to build up your muscles without shelling out a ton of cash on actual weights.
Alternatively, you could start by using canned food or books that you have around the house. As you begin to build your strength, add these items to bags to allow you to lift. In each case, make sure you’re lifting precisely the same weight on each arm so that you don’t develop uneven muscle tone.
Medicine Balls
Medicine balls can be made in the same way using a soccer ball or basketball. Slit a hole in the top of the ball and fill it with water or sand—tape over the top with duct tape.
You’ll then be able to change the weight of these too, and the uneven weight will help you to tone your core and develop your balance simultaneously. Read Here: Best Medicine Balls for Slamming: [Buyers Guide]
Kettlebells
Kettlebells can be created using the same soccer ball or basketball method. However, to build up your muscle even further, you could use cement to fill in your ball.
Slightly soften some PVC piping in the oven and mold it into a handle shape. You’ll then be able to slot this into the wet cement and be confident that it’ll stay put. Read Here: DIY Kettlebells for Under $8 in 6 Easy Steps
Battle Ropes
Battle ropes are an excellent all-around method to improve your strength, stamina, and cardio while toning all your muscles. They’re so versatile in their exercise use, that you can use them to do almost anything. And they’re possibly one of the simplest pieces of exercise equipment to make yourself. Read Here: DIY Battle Ropes – How to Make Your Own Battle Ropes
You’ll simply need to take an old hosepipe, cut off the ends that usually hold the nozzle, and attach to the tap, and duct tape one end securely, so it covers the hole. Fill the hose with sand – this may take a while to work it to the end – then seal the other end up in the same way.
Read More:
Summary
Making your own equipment for your home gym can really give you that sense of accomplishment. Now you’re able to complete a fantastic workout to improve your strength and overall fitness using tools that you’ve created yourself. Make sure that you consider your intended workout regime before you begin making anything to make sure that what you make is fit for purpose.


